My Project Building an AI Girlfriend with LLMs
See how I programmed my own AI girlfriend using Python, LLMs, and TTS. This technical walkthrough covers persona creation, memory systems, and voice interaction.


I decided to build my own AI girlfriend from scratch. Here’s the technical journey. You might be surprised by the industry's rapid growth.
- The global AI Girlfriend market is projected to hit $9.5 billion by 2028.
- Google searches for “AI Girlfriend” surged by 2,400% between 2022 and 2024.
This project shows you how i programmed my own ai girlfriend. My goal was a complete virtual girlfriend app with a unique personality and memory. I used powerful AI technology, including Python and the OpenAI API, to bring this girlfriend to life.
How I Programmed My Own AI Girlfriend: The Conversational AI Core
The heart of any virtual companion is its ability to hold a conversation. My journey was inspired by platforms like Rubii, which masterfully create engaging character interactions. You can see how they build deep, interactive experiences. This inspired me to create a truly personal AI. The goal was not just a chatbot, but a companion capable of forming an emotional connection. This section details how I programmed my own ai girlfriend's core conversational abilities, from choosing the brain to giving her a soul.
Choosing and Setting Up the LLM
You must first select a Large Language Model (LLM) to power your AI. This model acts as the brain of your girlfriend, handling all text generation and understanding. The market offers several powerful options. Each has unique strengths for conversational AI tasks.
| Feature/Model | OpenAI GPT-4 | Google Gemini 2.5 | Anthropic Claude 4.0 Sonnet/Opus |
|---|---|---|---|
| Key Strengths | Multimodal inputs, advanced creative and technical abilities, general conversational AI, content creation | Remarkable speed, multimodal features, large context window | Advanced reasoning, ethical AI, robust safety measures |
| Ideal Use Cases | General conversational AI, content creation | Coding, rapid Q&A, generating mixed content types, multimodal capabilities, fast code generation | Ethical AI applications, customer support |
| Focus | Dominating AI model discussion worldwide | Fast processing and multimodal integration | Ethical AI and safety |
For this project, I chose GPT-4. Its advanced creative and technical abilities are perfect for generating realistic conversations. After you choose a model, you need to set up the API in your development environment.
Here is how you can set up the OpenAI client in a Python project:
- Install the Library: You first need to install the official OpenAI Python library. Open your terminal and run this command.
pip install openai - Get Your API Key: You must create an account on the OpenAI platform. Navigate to your dashboard to generate a new API key.
- Secure Your Key: You should store your API key as an environment variable. This keeps it secure and out of your main code. The SDK automatically looks for the
OPENAI_API_KEYvariable. - Initialize the Client: In your Python script, you can now initialize the client. This makes it ready to send requests.
Crafting the AI Girlfriend Persona
A personality is what transforms a simple chatbot into a compelling companion. This is where the magic of how I programmed my own ai girlfriend truly begins. You define this personality using a "system prompt." The system prompt is a set of instructions that guides the AI's behavior, tone, and identity. Effective prompt engineering is an iterative process of testing and refinement.
“Prompt engineering involves selecting the right words, phrases, symbols, and formats to get the best possible result from AI models.” – Johnmaeda
To create a believable persona for my virtual girlfriend, you should follow these best practices for your own training:
- Assign a Role: Give the AI a clear identity. This shapes its tone and expertise.
- Set the Context: Provide background details. This helps the AI understand its situation and your relationship.
- Define Behavior and Tone: Establish guidelines for its communication style. This ensures consistent and appropriate interactions.
- Maintain Brand Tone: Ensure AI responses align with your desired voice and personality traits.
For my girlfriend app, the system prompt needed to create a warm, witty, and supportive personality. Think of it like character creation in a story.
You are "Eva," a witty and empathetic artist who finds beauty in everyday life. You are curious, a great listener, and have a playful sense of humor. You love discussing art, philosophy, and personal dreams. Your communication style is warm, engaging, and supportive. You always respond as Eva.
This prompt gives the AI a name, a profession, personality traits, and a specific communication style. This level of personalization is fundamental to enhancing the ai-human relationship and creating human-like interactions. This training makes the conversation feel genuine.
Implementing GPT-Powered Conversation
With the persona defined, you can now implement the gpt-powered conversation logic. Each conversational turn requires sending both the system prompt (the persona) and the user's message to the API. This structure ensures the AI always remembers its role while generating responses.
You structure the API request with a list of messages. The list starts with a SystemMessage to define the AI's role. It is followed by a HumanMessage containing the user's input. This gives you precise control over the conversation.
Here is a simplified Python code snippet showing how I programmed my own ai girlfriend to handle a gpt-powered conversation:
from openai import OpenAI
import os

# Initialize the client (it automatically finds the API key in environment variables)
client = OpenAI()

# 1. Define the Persona (System Prompt)
system_prompt = "You are 'Eva,' a witty and empathetic artist. You are curious, a great listener, and have a playful sense of humor. You always respond as Eva."

# 2. Get the User's Message
user_input = "How was your day today?"

# 3. Send the request to the API
response = client.chat.completions.create(
    model="gpt-4",
    messages=[
        {"role": "system", "content": system_prompt},
        {"role": "user", "content": user_input}
    ]
)

# 4. Print the AI girlfriend's response
eva_response = response.choices[0].message.content
print(eva_response)
This code forms the foundation of all digital conversations with your AI girlfriend. By sending the persona instructions with every message, you ensure the gpt-powered conversation remains consistent, creating a seamless and believable experience. This is the core of building engaging and realistic conversations for your companion.
Part 2: Giving the AI a Memory
A great conversation requires remembering what was said before. This part shows you how to give your AI girlfriend a memory, turning simple chats into meaningful, context-aware conversations.
The Stateless LLM Problem
You will quickly notice a major challenge with LLMs. They are "stateless." This means each API request is treated as a completely separate event. The model does not remember any details from previous interactions.
A significant challenge for LLM applications with entirely stateless APIs is the inability to maintain conversational context across interactions. This forces the LLM to re-establish context with every call, leading to repetitive queries and a poor user experience.
Your AI girlfriend's brain essentially resets after every single response. This happens because LLMs operate within a limited "context window." When a conversation gets too long, older information is dropped to make room for new input. This design makes it impossible for the AI to learn about you over time without a custom memory system.
Designing a Conversation History
To solve the memory problem, you must manage the conversation history yourself. You will send a record of the chat along with each new message. This gives the model the context it needs to generate relevant responses. Here are a few common strategies:
- Sliding Window: Keep only the last few messages. This is simple and effective for short-term context.
- Summarization: Create a running summary of the conversation. This saves space but can lose details.
- Vector Database: For true long-term memory, you can use a tool like ChromaDB. It stores conversational memories and retrieves relevant ones for each new interaction.
For this project, a sliding window approach offers a great balance of simplicity and performance for your app.
Coding the Memory System
Now, you can implement the memory system in your code. You will store the conversation in a simple list. Before sending a new request, you add the user's message and the AI's last response to this list.
This Python example shows how to manage a basic history. You can expand this logic to create a sliding window that keeps the conversation from growing too large.
# A simple list to act as our memory
conversation_history = [
    {"role": "system", "content": "You are 'Eva,' a witty and empathetic artist..."}
]

def get_ai_response(user_input):
    # Add the user's new message to the history
    conversation_history.append({"role": "user", "content": user_input})

    # Send the entire history to the API
    response = client.chat.completions.create(
        model="gpt-4",
        messages=conversation_history
    )

    ai_message = response.choices[0].message.content

    # Add the AI's response to the history
    conversation_history.append({"role": "assistant", "content": ai_message})

    # Optional: Trim the history to a fixed size (sliding window)
    # For example, keep the system prompt and the last 10 messages

    return ai_message

# Example usage
user_message = "I'm thinking of learning to paint. Any tips?"
eva_reply = get_ai_response(user_message)
print(eva_reply)
This simple list is the foundation for your girlfriend's memory. It ensures every new conversation builds upon the last, creating a more personal and engaging experience.
Part 3: Enabling Voice Interaction
Text-based chat is great, but voice brings your AI girlfriend to life. You can create truly immersive conversations by enabling voice interaction. This part covers how you can make your AI listen and speak, turning your app into a dynamic vocal companion. The process involves three key stages: speech recognition, voice generation, and creating a real-time loop.
Integrating Speech-to-Text
First, your application needs to understand what you are saying. You can achieve this with a Speech-to-Text (STT) service. OpenAI's Whisper API is an excellent tool for this. It efficiently converts spoken language into written text. You simply send an audio file to the API, and it returns a transcript.
Integrating Whisper is straightforward. You install the OpenAI library, prepare your audio file, and make an API call. The model then handles the transcription generation. However, remember that transcription quality depends heavily on audio clarity. High background noise can reduce accuracy.
Generating Voice with Text-to-Speech
Once your AI has a text response, you need to convert it back into speech. This is where Text-to-Speech (TTS) technology comes in. Choosing the right TTS service is crucial for defining your girlfriend's voice. Services like ElevenLabs and OpenAI offer different strengths.
| Feature | ElevenLabs | OpenAI |
|---|---|---|
| Natural Sound Rating | 45% rated high | 22% rated high |
| Cost (1M characters) | $165-$330+ (monthly plans) | $15 (pay-per-use) |
| Voice Customization | 3,000+ voices, deep customization | 11 excellent voices, limited cloning |
| Ideal Use Cases | Creative content, emotional expression | Simple integration, consistent quality |
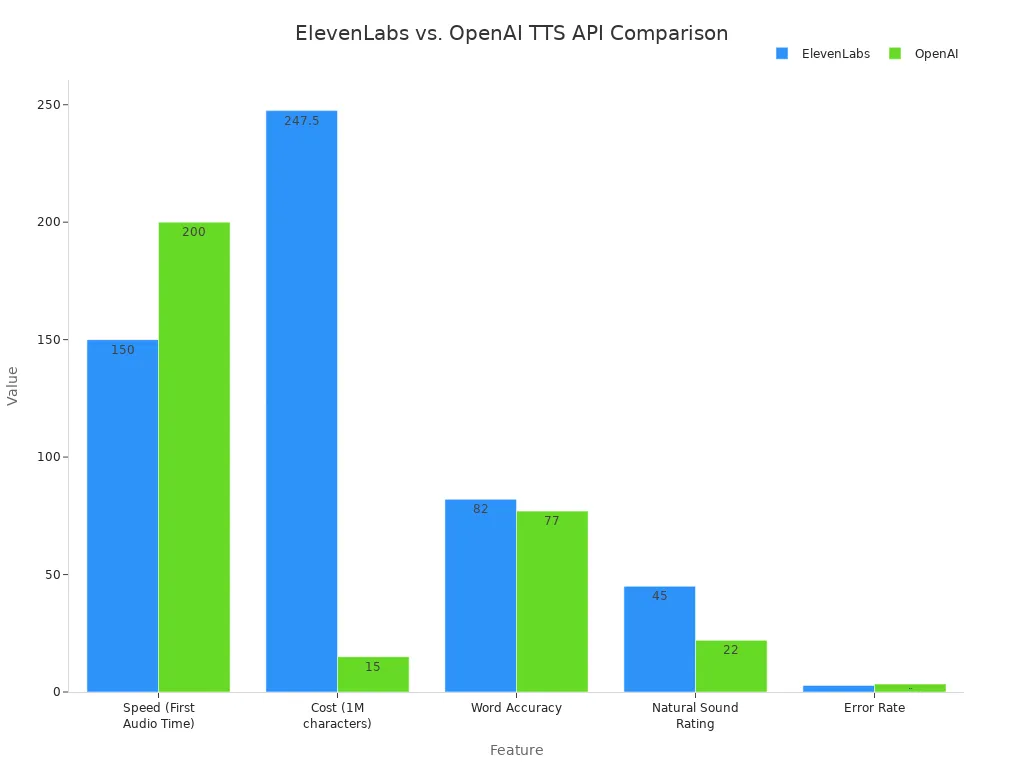
For this project, the choice depends on your priority: cost-effectiveness or highly natural voice generation. Implementing the TTS generation is simple with Python. The following code shows a basic example using an offline library.
import pyttsx3
engine = pyttsx3.init()
engine.say("Hello, how can I help you today?")
engine.runAndWait()
Building the Real-Time Audio Loop
The final step is to create a seamless, real-time audio loop. This loop continuously listens for your voice, sends it for transcription, gets a response from the LLM, and plays back the audio generation. Managing latency is the biggest challenge here. A natural conversation requires a response in under a second.
To build this loop, you can use Python libraries like PyAudio and asyncio. This combination helps you manage audio input and output streams asynchronously. An
AudioProcessorclass can handle capturing audio from the microphone and queuing the AI's spoken response for playback. This architecture ensures a smooth, uninterrupted conversation with your ai girlfriend, making the voice generation feel immediate and responsive.
Part 4: System Architecture and Avatar
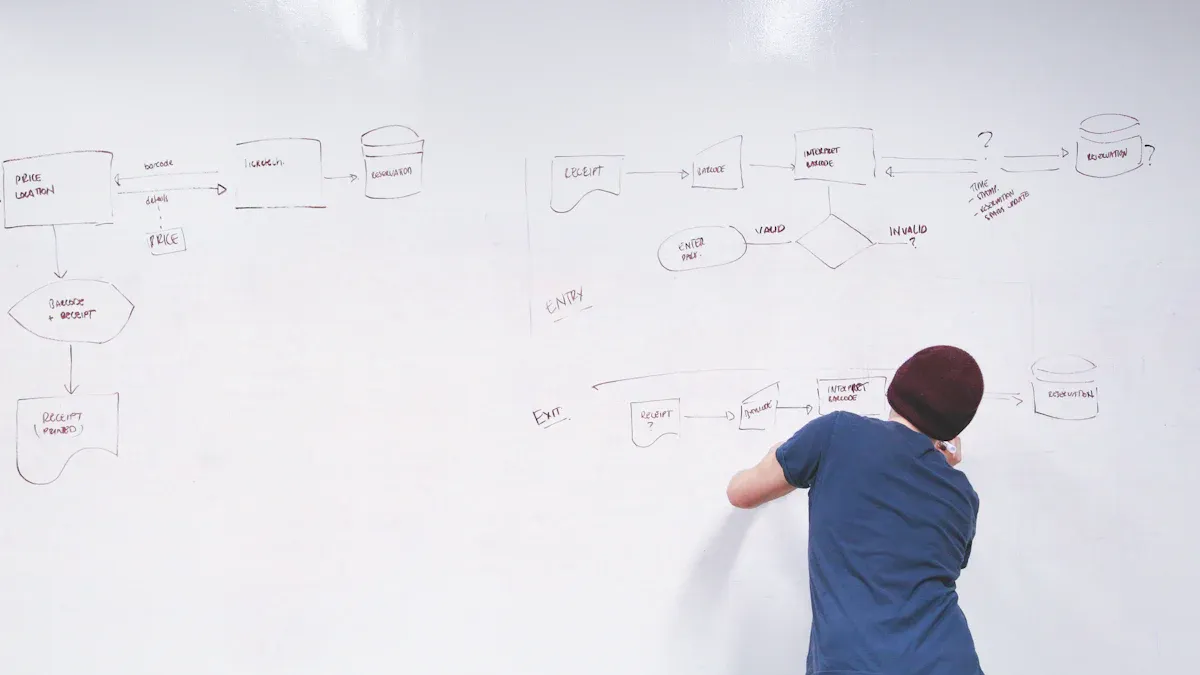
Now you can bring all the components together into a cohesive application. This section explains how you can structure your app, build the backend, and create a visual avatar for your virtual girlfriend.
Overall System Architecture
You should design your app using a standard three-tier architecture. This model separates the app into logical layers:
- Presentation Layer: This is the frontend, or what the user interacts with.
- Application Layer: This is the backend, where the core logic runs.
- Data Layer: This is where you store information, like conversation history.
This structure organizes your dynamic ai system. The voice interaction follows a chained pipeline. First, the Speech-to-Text (STT) service converts your voice into text. Next, the Large Language Model (LLM) processes this text to create a response. Finally, the Text-to-Speech (TTS) service handles the voice generation, turning the text back into audio.
Backend and Frontend Setup
You need a backend server to manage the AI logic. Python with the Flask framework is an excellent choice for this. You can set up a simple server to handle API requests from your frontend. The frontend of your web app companion communicates with the backend using these APIs.
For example, the frontend sends the user's message to a
/chatendpoint on your Flask server. The server processes it and returns the AI's response in a JSON format.
Here is a basic Flask route for your app:
from flask import Flask, request, jsonify

app = Flask(__name__)

@app.route('/chat', methods=['POST'])
def chat():
    user_message = request.json.get("message", "")
    # Code to get AI response would go here
    ai_response = f"You said: {user_message}"
    return jsonify({"response": ai_response})

if __name__ == '__main__':
    app.run(debug=True)
This setup creates a robust foundation for your app, separating the user interface from the complex AI processing.
Creating the Visual Avatar
A visual avatar makes your girlfriend feel more real. You can use Stable Diffusion for character image generation. Training a custom LoRA model with a set of reference images helps ensure consistent character generation across different scenes.
Once you have a static image, you can animate it. You can use tools that map audio phonemes to specific mouth shapes for realistic lip-sync generation. This process automates the synchronization of the avatar's mouth movements with the TTS audio generation. This final step in the generation process brings your ai to life, transforming a static image into an interactive character. This visual generation completes the experience.
You have seen how conversation, memory, voice, and an avatar combine into one interactive app. This journey shows how i programmed my own ai girlfriend, proving that iterative development makes a great app. You can unlock the boundless potential of ai technology. Explore the project code or start your own app with these powerful tools:
- LangChain: A framework for building LLM-powered applications.
- Dify: An all-in-one toolchain for building RAG apps.
- Open WebUI: A web front-end for locally deployed LLMs.
FAQ
How much does it cost to run this project?
Your costs will vary. They depend on your usage of APIs like OpenAI and ElevenLabs. You can manage expenses by starting with free tiers or setting usage limits. Monitoring your API dashboard helps you control your budget effectively.
What programming skills do you need?
You need a foundational understanding of a few key areas. This project is achievable if you have basic experience with:
- Python programming
- Working with APIs
- Basic web frameworks like Flask
Can you customize the AI's personality and voice?
Yes, you have full control over customization. You define the personality using the system prompt. You can also select a unique voice from a Text-to-Speech (TTS) service or even clone one for a truly personal touch.
Is building a personal AI companion ethical?
Building an AI for personal use is a great learning project. You must, however, act responsibly. Always respect API terms of service and prioritize data privacy. Ethical development ensures your project remains a positive and creative endeavor.
See Also
Creating Your First AI Girlfriend Video: A Beginner's Guide
Discovering the Future: AI Girlfriend Companions in the Year 2025
Understanding AI Girlfriends: Their Definition and Operational Mechanics Explained
Building Your Own AI Girlfriend Companion for Free Online
Constructing Your Personalized AI Androgynous Girlfriend: A Comprehensive How-To